The world is unfair. My Ultimaker printer had to do more then 70 hours of printing and it took me only 1 hour to put the parts on the inMoov robot. 😉 Below you can see all the parts from the Chest.

From left to right and from top to bottom you can see the following parts:
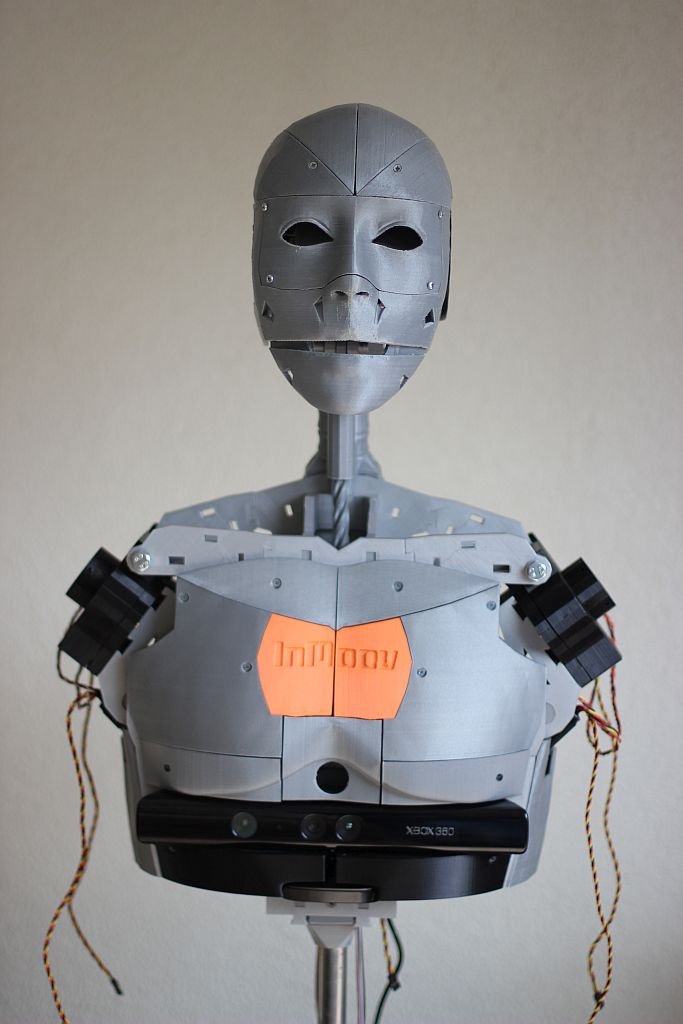
- ChestTopAttachV1 (right and left part)
- ChestTopV1 (right and left part)
- SideRibsCoverV1 (right and left part)
- ChestRightV1
- InMrightV1HollowV1 (orange)
- InMleftV1HollowV1 (orange)
- ChestLeftV1
- BottomChestV1(right and left part)
- MiddleChest+PIRV1
- UnderKinectV1 (right and left part in black)
I am very happy with the results of these prints and they fit really well. The easiest way to mount the chestparts is starting with the ChestRight and ChestLeft together with the InMrightV1Hollow and InMleftHollow. After this you can mount the MiddleChest+PIR and the Kinect. The Kinect is mounted with the UnderKinect parts. I had to push it in with a little bit force to fit it together. I think this was caused by some warping of the prints.
The inMoov robot gets a PIR sensor to react on people moving by. This is not done yet so you can see a nice hole where the PIR sensor should.


Make sure you check the website from Gael Langevin at www.inmoov.fr.